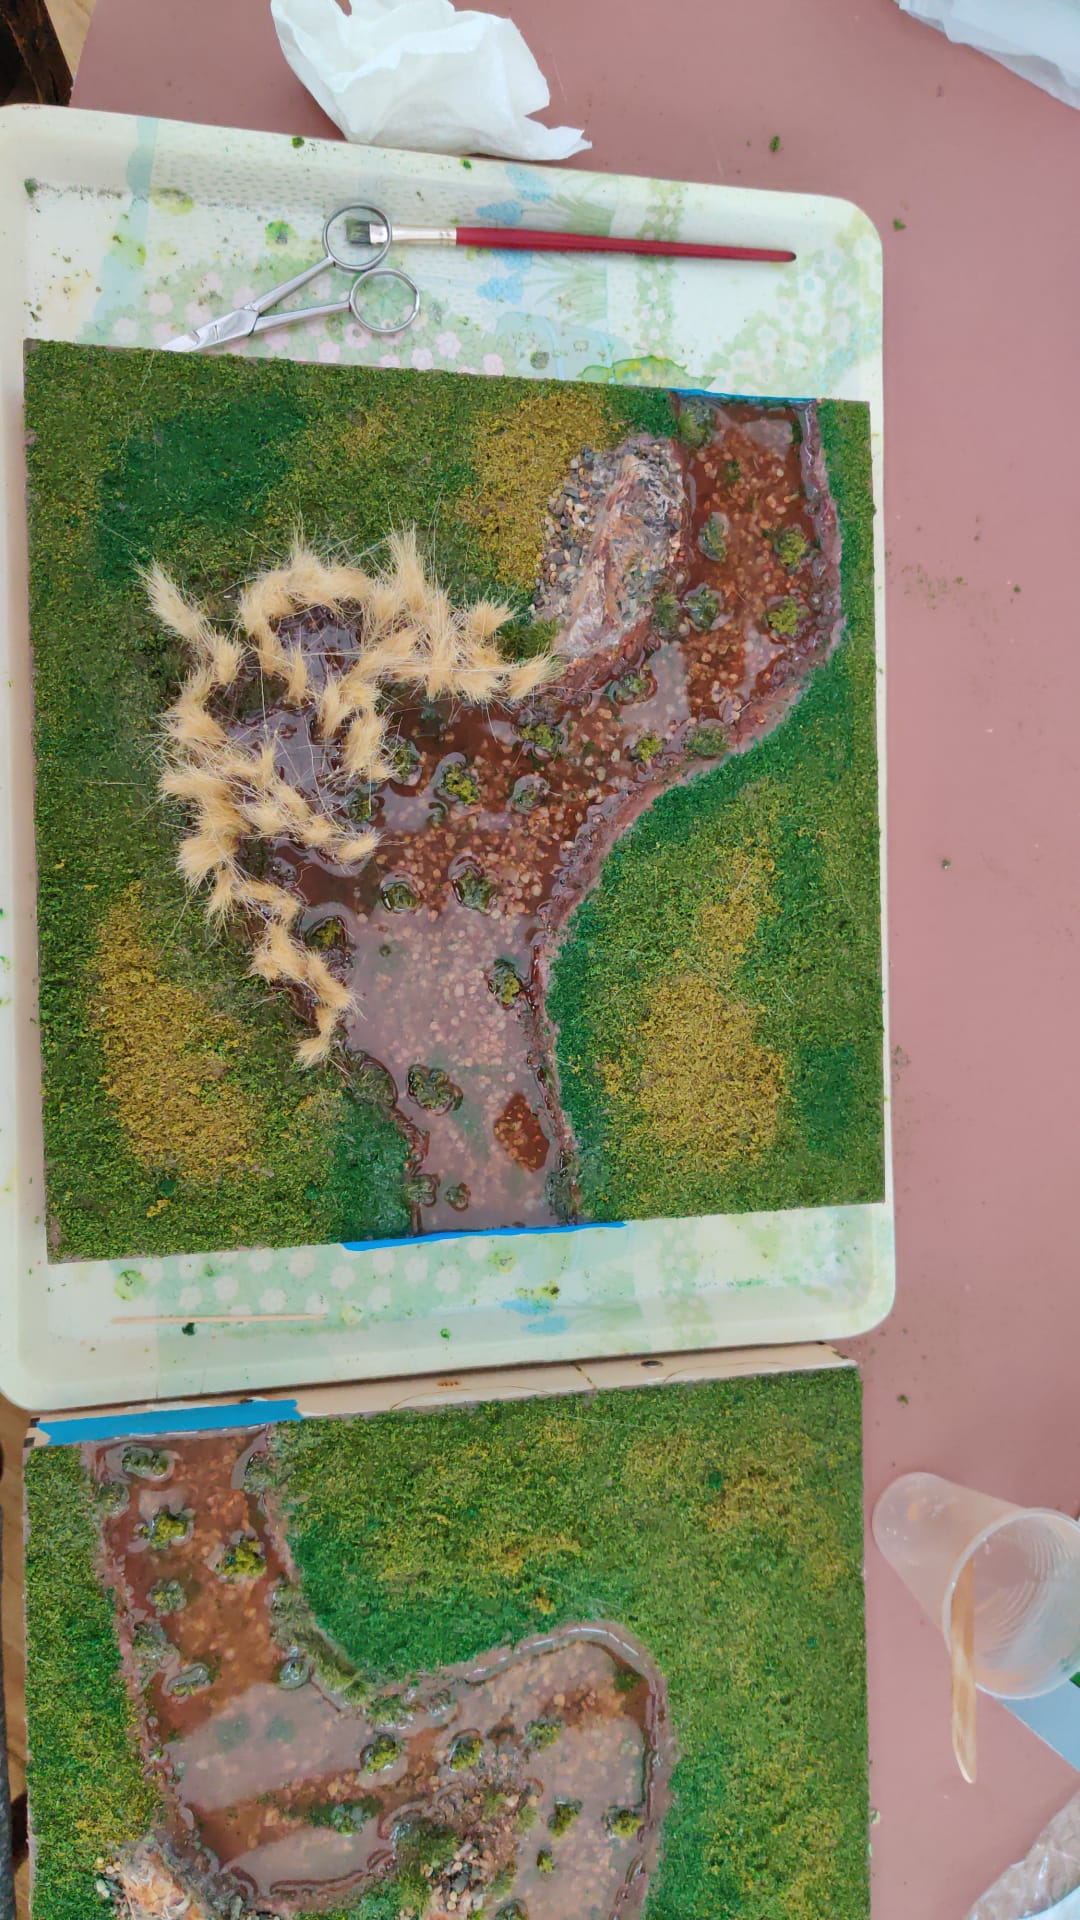
Or actually probably just streams. They really aren’t wide enough to be rivers (although Sally4th do river tiles for the Terra-formers system as well, which are much larger).
One of the reasons that I am trying out these particular modular terrain boards is that it should give me more opportunity to delve down into the boards as well – I have never been aesthetically fond of the style of wargaming river that sits above the table, with levee banks to give the centre of the river the impression that it is filled with water. And also having to paint them with optical illusion of depth in the centre is never that convincing.
So for these, I can actually sculpt streams into the extruded polystyrene of the board. That has turned out to be a lot more complicated and fiddly than I thought, with the result that these streams are actually a bit too shallow in the centre of the board, compared to the edges where the profile is set by the shape of the mdf frame. In the case of one of the boards, this isn’t too much of an issue because it is supposed to be a ford, but for the others, I am not so sure about them – in retrospect I should have dug them deeper, so that I could have had higher banks.
Texturing the bottom of the rivers has also been quite a challenge. In the end I have used some cheap small aquarium gravel that I got off Amazon as the main texture, and then washed it with diluted burnt umber paint to give it a wet muddy feel. I have then stuck down clumps of clump foliage in a sort of olive green to try and look like clumps of plants or weed growing in the bottom of the river. There is also quite a lot of flock that scattered into the river when I was flocking both sides, and I have left that there as smaller bits of plant life.
For the reeds around the edges of some areas, I used dobs of PVA glue and stuck bundles of long field grass in. No idea what these were or where I got them – they have been hanging around in my basing materials box for decades it feels like (edited – worked out what they were).
For the river itself, I am using GlassCast 10/50 epoxy resin. I looked at polyurethane resin, but it seemed like a lot of hassle with the smell, and it dissolving the polystyrene. I cast it in two layers. The first I tinted with some brown pigment – one drop of Milk Choc Brown CULR Epoxy Pigment per 75g of mixed resin. That gave a surprisingly strong colour when mixed in – I wanted brown as the most realistic colour (I think) for a real stream – I didn’t want it to be completely crystal clear, although that might be more realistic, because I wanted the details of the stream bed to be a bit more difficult to see.
To seal the ends of the stream sections where they were open, I used masking tape and then also ran some PVA glue around the edge where the stream bed joined the masking tape to make sure that the joint was well sealed. It seemed to work – none of the six ends leaked, which was a relief.
Because the lower layer was more strongly coloured than I intended, I did the top layer with no pigment at all. It felt like the pigment also affected the flow and surface tension of the resin as well though, so the top level didn’t flow as well around the edges of the clump foliage and the reeds. Even when I smoothed it in, it seemed to retract, and when everything had dried, it had gone back to an unnatural effect there. It did also make it cure more quickly as well though.